Session 15: Touch-ups

Just a short session by myself. The only work done was the cutting of the rope ladder and reinforcing small parts that stuck up slightly.

Time Spent: ~2 hours


Figure 1: Ropes (Uncut)
Figure 2: Ropes


Figure 3: Ship 

Figure 4: Ship

Figure 5: Ship


spacer

Session 14: (Almost) Completed!

The penultimate session was our longest yet! Today we made the second mast and the compartment at the stern. The ship is structurally completed, all that is left are some small details that need to be glued on. Those will be done tomorrow to finalize the ship in its entirety.

We started with the back compartment today, which was not too bad since it was bigger than the crow's nest and thus easier for our hands to handle [Figure 1, 2].

After that, the back mast was made out of the remaining pieces [Figure 3, 4]. The sails still need a tiny of bit paper to cover the parts connecting to the mast, but aren't structurally needed so they're basically done.

The other pictures [Figure 5-10are an all-around display of the ship. Even though another full cycle of pictures will be taken after the remaining small details are added, there will not be any major differences, which will be negligible at best.


Time Spent: ~8 hours

Figure 1: Compartment (Pieces)

Figure 2: Compartment


Figure 3: Back Mast (Pieces)

Figure 4: Back Mast

Figure 5: Ship (Back, High)

Figure 6: Ship (Back, Low)
Figure 7: Ship (Side, High)

Figure 8: Ship (Side, Low)

Figure 9: Ship (Front)

Figure 10: Ship (Back)

spacer

Session 13: Front Mast and Sail

The front mast and sail was made today in our longest session yet. The addition of the ship's front mast, complete with their trademark crew symbol really gives the model more character as we race toward completion.

The crow's nest at the top of the mast was made first, small pieces for sure but due to the angular shape it was relatively easy to build [Figure 1, 2].

The sail was also built from 6 separate pieces: 3 on the front side and 3 on the backside [Figure 3].

Next we made the mast pillar and the supporting structures [Figure 4, 5, 6], which took the longest. Rolling up those beams was really annoying and time-consuming since they kept breaking shape, but through the use of rubber bands and chopsticks, we managed it.

When putting together the mast, we had to trim the bottom of the pillar a little to get it to be the right height when inserting it into the ship [Figure 7, 8]. Aside from that, assembly was pretty simple.

That mast looks sweeeeet though [Figure 9, 10, 11]! Next time we'll do the back mast and the compartment on the stern to finish off this journey.


Time Spent: ~6 hours

Figure 1: Crow's Nest (Pieces)

Figure 2: Crow's Nest

Figure 3: Main Sail (Pieces)


Figure 4: Mast Support Structure (Pieces)


Figure 5: Mast Pillar


Figure 6: Mast Binding Components

Figure 7: Mast Parts

Figure 8: Mast

Figure 9: Ship (Front)

Figure 10: Ship (Back)

Figure 11: Ship (Front II)

spacer

Session 12: Deck Extras (Part II)

We finished the deck! Woooohooooooo!

This session was spent creating the stairs [Figure 1with our cheat tool, a hot glue gun. Even with that, it was hard to situate the pieces in such a way to make the stairs look angular, especially the two curved ones near the middle of the deck.

After that, we added all the fences lining the deck as well as the trees and shrubbery [Figure 2, 3.

With this, we now have Part 1 and 2 done [Figure 4, 5]! All that is left is to do Part 3, which consists of the two masts and a compartment that attaches to the stern.

Time Spent: ~4 hours


Figure 1: Stairs
Figure 2: Completed Deck (Front)

Figure 3: Completed Deck (Back)


Figure 4: Completed Deck (Top)

Figure 5: Completed Deck (Side)


spacer

Session 11: Bow Attachment and Deck Extras (Part I)

Long session today, but very little apparent progress to show for it. We attached the cabin [Figure 1and the completed bow of the ship [Figure 2, 3, 4to the main body, which looks amazing !

The reason why we made so little progress today was because after that, we began constructing some of the smaller pieces that detail the deck. Making trees [Figure 5, 6and stairs is amazingly hard and took an ungodly amount of time to cut out. Only a single set of stairs was constructed [Figure 7], we decided to revisit them next time with a hot glue gun so that the steps can set in a proper zigzag shape.


Time Spent: ~4 hours

Figure 1: Cabin

Figure 2: Ship with Attached Bow (Side)

Figure 3: Ship with Attached Bow (Top)

Figure 4: Ship with Attached Bow (Top)

Figure 5: Trees (pieces)

Figure 6: Trees 


Figure 7: Stairs


spacer

Session 10: Ship's Bow Complete!

Somewhat sorter session today, but great results! The disparate pieces that we created last session but did not combine were assembled into a singular unit.

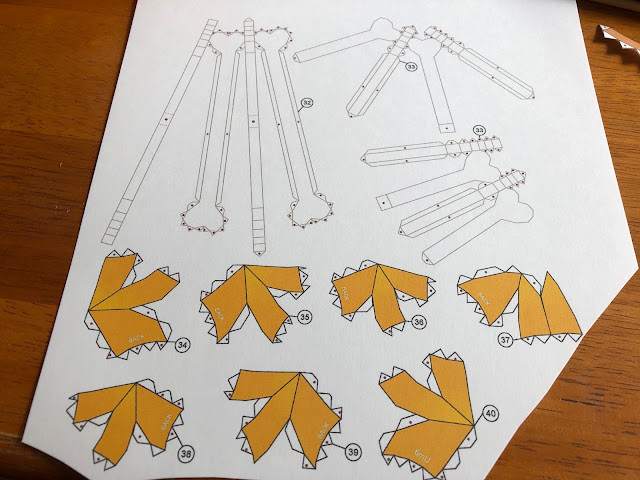
The lion's paws were created [Figure 1and added to the bow first. The claws were kind of confusing but they look alright so not going to worry too much if they were attached properly or not [Figure 2, 3].

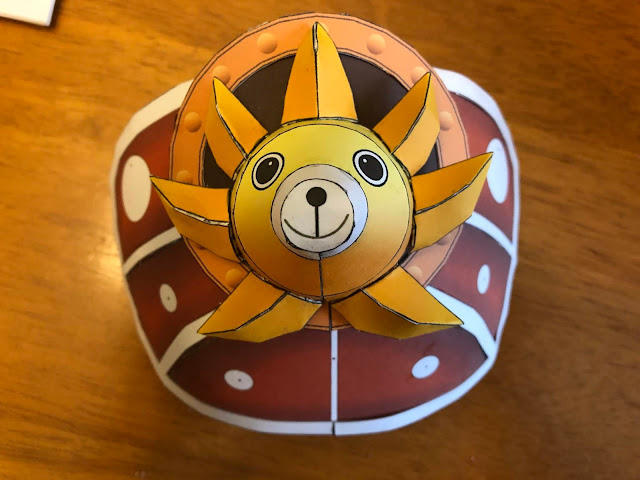
The bones were completed [Figure 4from last session and enabled us to finally glue everything else together. The lion's head obviously goes on top, followed by the bones and then the circular panel. Lastly, they attached to the large bow piece [Figure 5, 6]. We will connect the now completed bow of the ship to the main body next time.

Time Spent: ~3.5 hours

Figure 1: Lion's Paws

Figure 2: Lion's Paws Attached (Side)

Figure 3: Lion's Paws Attached (Front)


Figure 4: Crossbones

Figure 5: Completed Bow (Side)


Figure 6: Completed Bow (Front)


spacer

Session 09: Ship Bow and Figurehead


Another long session today! We started by adding the last structure to the side panel [Figure 1], which should be the final detail to that section [Figure 2, 3].

We cut out the pieces for the figurehead of the ship [Figure 4and the pieces that made up the lion's mane [Figure 5]. We did not get enough time to work on the bones that are supposed to be directly behind the head, but that will be the first part that we finish next time.

After creating the head, we worked on making each piece of the mane and attached them sequentially [Figure 6]. As of now, the parts we made this session [Figure 7, 8are still unattached to each other due to the need for the bones to still be created. Those will rest between the head and the brown circular panel.

The large bow piece can finally be attached to the main body of the ship next session as well, due to us finally figuring out how to orient the connecting strip.


Time Spent: ~5 hours

Figure 1: Side Extension (pieces)
Figure 2: Side Extension (Outward)


Figure 3: Side Extension (Inward)
Figure 4: Figurehead (pieces)


Figure 5: Figurehead's Mane (pieces)

Figure 6: Figurehead Creation

Figure 7: Figurehead and Bow (Front)

Figure 8: Figurehead and Bow (Side)


spacer